Make HDR Photos without any special equipment
Ever wanted to make HDR photos? The purists would insist on taking three photos, one overexposed, one underexposed, and one just about right, then combine all three, then output a high dunamic range image, then....!
Sounds daunting, doesn't it? But don't worry. Leave your photography concerns at the door, pull up a chair and let me explain how you can easily make HDR photos.
First of all, you might be wondering what HDR photos are? If so, have a look at the image below. It's a rollover - one image is the original, and the other one is the HDR photo. Roll your mouse over the image to see both photos.
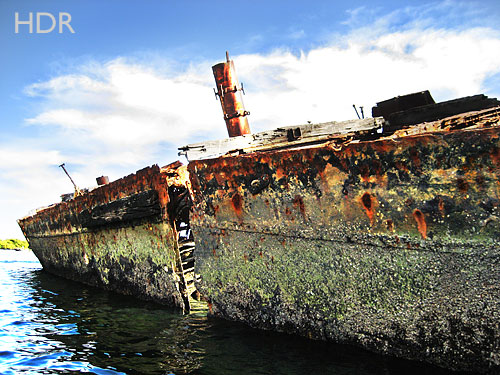
HDR stands for High Dynamic Range and basically means a photo has a much wider range of tones (from light to dark) than a normal photo. There's a more in depth explanation of HDR photography here.
How do you make HDR photos?
Or, to ask another question, how do you make HDR photos without having to take three photos to start with? Well, here's how.First, select your photo, and then head over to pixlr.com where you can make use of the fantastic free online image editing software.
Once there, load up your image. If you want the simple technique - here it is:
- Load your image
- Click on Filter
- Choose Mimic HDR from the drop-down menu
- Job done!
However (there's always someone on hand to say 'however', just when you thought you'd cracked it!), however, there are some issues with using this method.
The bright whites become just as overblown as before - in other words, if you have a block of white cloud like I have in the example above, it will still end up being a block of white cloud.
And if you have a dark area in your photo you'll still end up with a big block of darkness.
So, it's good, but there are a few tweaks that can take 'good' to 'great!'
To make HDR photos better, first you need to bring back the highlights
And to bring back the highlights you need to use something called the 'burn' toolFirst of all, select the burn tool from the panel on the left - it's the little icon that looks like a hand

Once you have the burn tool you need to swipe it over the highlights of your image.
The burn tool darkens the area it's waved over. The technique goes back to the days of darkrooms where you would expose your photo, then create a mask (usually from card), place the mask over the image, leaving the bit you wanted 'burnt' open to be exposed a second time.
Thankfully it's a lot simpler with digital photography!
So, back to the digital burn tool - wave it over the light patches, which in the example above are the clouds, and it will begin to bring back the detail. The screenshot below shows what you should be happening:

Once you're done with the burn tool you might want to bring some dark areas back if they're too underexposed. If you do, it's the same process as the burn tool, but you use the 'dodge' tool instead.
The dodge tool is next to the burn tool in the panel on the left - it looks like a magnifying glass, but actually represents a circular mask. These masks used to be waved over an image in the darkroom to shield it from the enlarger lamp, which, in effect, underexposed those areas and created a lighter patch.
But enough of all this darkroom stuff - you're here to make HDR photos! IF you have any dark areas, wave the dodge tool over those areas in the same way you used the burn tool.
Be careful with the dodge and burn tools though - you want to keep a good range of tones for the HDR effect to work.
Final step - use the mimic HDR photo button
Once you've finished with all the dodging and burning, then go back to the Mimic HDR button (click on Filter and then choose Mimic HDR from the drop-down menu), and click it to let Pixlr complete the effect.And there you have it, how to make HDR photos without having to go through all the faff of taking three shots to start with.
My son (that's him below) loves F1. He's started his own YouTube channel and would love it if you could take a look at one or two of his videos.
Or, if it hurts your ears as much as it does mine, pass the link on to someone who'll really appreciate it.
Or, if it hurts your ears as much as it does mine, pass the link on to someone who'll really appreciate it.
(probably someone a lot younger than I am!)
 Get help using your camera with the complete Digital SLR Guide |