Night photography - capturing cityscapes
Night photography is great. And the results can be outstanding. So why are digital photographers often disappointed?
 |
The tips here will require some equipment. None of it is that special, or that expensive though.
And you probably already own the most important piece of equipment - a camera.
If you haven't already done so, have a look at the night photography equipment page. (opens in new window)
Next to a camera, the most important thing you will need is some tips - and you'll find those below.
SAFETY NOTE: Be aware that some places are less safe than others after dark. Take sensible precautions. Keep your camera hidden as far as possible, and maybe take a friend along too.
Night Photography techniques - the set up
When taking night time photos of cities, there are a couple of planning tips you will need to bear in mind before you take any photos:
First, you need a good viewpoint;And second, you need either a tripod or a solid base to place your camera on.
And third (well, I guess this is optional!), a photography 'trick book' - with some fancy techniques that can really take night photography to a whole new level.
Back to those first two essentials - the viewpoint - this depends a little on the type of shot you are after. My preference is for somewhere that is above the ground (a set of steps, for example), but not always. Sometimes the best shots can be had at ground level.
You need a tripod or solid base because your camera's shutter will be open for several seconds, and you need to make sure the camera doesn't move during those seconds.
Then, if you have a tripod, secure your camera upon it. If you don't, find a solid surface to rest your camera on; propping it up with something like a bag or jumper.
Once your camera is in place, make sure your shutter speed is set to a good few seconds. Start with about 15 seconds.
If you can't control your camera's shutter speed, set it to "night" mode.
Click here to read more about what shutter speed is, using shutter speed creatively and creative photography tips for stunning images.
Night photography - taking the photo
Once you are set up (camera on a solid surface, self timer primed), you are ready to shoot.
First, check your scene. Is everything in it that you wanted to be in it? If you are aiming to get streaking car headlights, is there any traffic around?
Once you are happy with things, press the shutter button.
Your self timer will count down. Special Note! - If you are waiting for something to appear in your scene, you will need to remember that your self timer will have to count down first - plan some time for this.
When the shutter clicks, wait. And wait, and wait . . . until it closes again. Remember that this will be a few seconds.
Then wait some more. Because of the long exposure digital cameras take longer than usual to process the photo, so your preview on your camera's LCD screen may take a while to show up.
If you're 'painting with light' (and why not add a little twist to your night photography?) you can tell your assistant their job is done. Never heard of painting with light? Everything you need to know is in this downloadable ebook.
Night photography - what makes a good shot?
This is just my opinion, but here are a couple of things that I think make a good night photography shot:
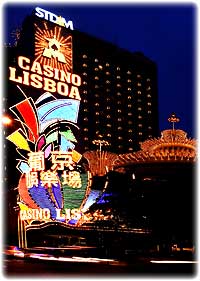
- Neon lights
- Streaks of car headlights and tail lights
- Available light
For both of these you need to plan a little in advance. Find an area where you can safely photograph neon lights.
Find your solid spot (or put your camera onto a tripod), and then take a few shots. Because neon lights flash you will need the shutter to be open for some time in order to catch all the flashes.
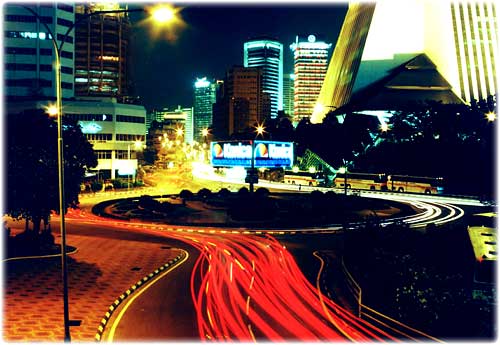
And for streaks of car headlights and tail lights - find a spot with a lot of traffic.
Try to get something in the background too - streaks of light on their own can be a little boring!
Then take your shot.
The longer the shutter is open, the more streaks you will capture. And of course, the more traffic there is, the more streaks will appear too!
The available light also has a part to play in making a good night photography shot.
Sometimes a scene looks its best when set amongst inky-black skies. Sometimes, a little light works best, so shots just before dark really sets in are worth a try too.
And some scenes look just great when you inject a little photography magic into them. There are plenty of creative ideas here.
Try both, and see what captures the effect you are after best.
Night photography - final tip
My final tip is very simply this - practice!
You will find that sometimes a 10 second exposure gets the look you are after. Sometimes you may need up to a minute.
Practice, and you will soon get a feel for what you will need for any given situation.
And my final, final tip . . . cheat! There are ways to create stunning night photography effects - and you don't even need Photoshop. Here's a great little ebook I've found that shows you how to create some stunning effects.
Or, if it hurts your ears as much as it does mine, pass the link on to someone who'll really appreciate it.
 Get help using your camera with the complete Digital SLR Guide |