Make a quality black and white picture using Photoshop
It should be easy to get a good black and white picture from a modern digital camera. After all, most come with a special black and white mode. But my advice – steer clear of any of those special camera modes!
 |
If you haven't already, read my black
and white photography home page
to find out why.
It would also be worth
having a look at my black
and white photography tip #1 page
to get an idea about what images will make a good black and white
picture.
Ok, I'll assume that you've had a look at my other black and white
photography pages, and are sitting at your computer with good image at
the ready. You have fired up Photoshop (or another good photo editing
software), and have a steaming hot cup of coffee standing by to see you
through!
NB: in the tutorial below, words in bold green
refer to menus and menu items in Photoshop.
Here we go then . . .
first, open your image in Photoshop.
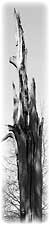
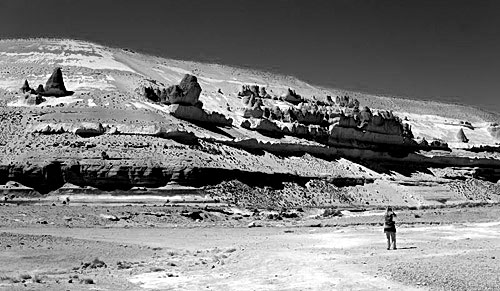
The example image I am
going to use is shown below. It's has good contrast and is a little
“gritty” – a perfect start image for a black and white picture.
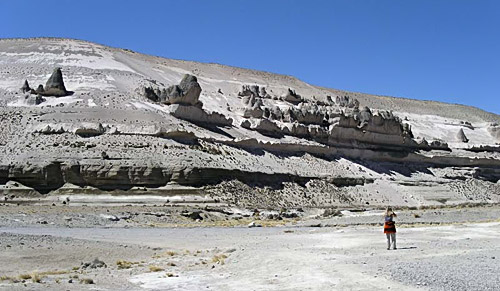
In case you're interested, I took this
photograph in the Peruvian Andes. Its an old volcano. The small “cones”
you can see coming off the rock are the remains of lava that was stuck
inside the mountain. The top of the mountain has worn away, leaving the
harder-to-wear-down lava cones behind.
So, how do we turn this
colour image into a great black and white picture?
First, you need to add a
new layer. To do this, go to Layers,
(arrow number 1 below) and then go down to New
Adjustment Layer and choose Channel Mixer…
(arrow number 2 below).
NB: It is always a good idea to make
adjustments like this on a new layer in Photoshop. That way you can
edit the layer later if you think it needs some adjustment. Or just
delete it if you decide you don't like the effect it has. And you won't
have altered your original image at all.
Once you have clicked on
Channel
Mixer a window will pop up asking you to name
it. Give it a name if you like, or just click on OK and you
will see the Channel Mixer dialog box appear.
Have a look at the one
below:
You will see that the channel mixer allows you to adjust the levels of
all three channels in your image (the red, green and blue).
We're interested in
making a black and white picture here, so the first thing to do is tick
the Monochrome
box (arrow number 1 above).
Also check that the Preview
box is ticked, so that you can instantly see the effects of changes you
make.
Once you tick the Monochrome
box you will see your colour digital photograph turn into a black and
white picture!
But wait . . .
there's much more
, and this is why the channel mixer is so much better for
black and white photos than using simple greyscale.
Each channel of colour
information is still there in your image. You can
control it
by using
the red, green and blue sliders.
If you move a slider to
the right (increase it), it will make those coloured parts of the
original image lighter.
For example, if your
original colour image has a blue sky (like my image does) and you move
the blue slider up, the sky (in black and white mode) gets lighter.
Move it down and the sky gets darker.
The same applies to red
and green. Lots of green trees in the original? Move the green slider
up and they turn whiter in the black and white picture. Move the slider
down and they get darker.
In the days before digital photography, photographers used black
and white film and put a red filter over
their lens before taking the photo. This gives black
and white photographs a much more punchy feel
to them.
We can create the
same effect
here by moving the red slider up. Have a look at the next
screenshot below. I've adjusted the Red
channel to +20 (arrow number 1 below). This instantly gives your black
and white picture a lift.
NB: you will notice that the red channel is
already set at 100%. You will still need to push it up a little to get
a good effect.
It's important to adjust the Constant
slider at the bottom (arrow number 2 below). This balances your picture
a little.
As a general rule, add
up your total adjustments for the red, green and blue channels.
Whatever number that is, halve it, reverse it, and make that your
Constant value.
In my example, I've
added 20 to the red and nothing to blue or green. So my total is +20.
Halve that (+10), and reverse it (-10), and set the Constant
to that number.
Once you've had a play
with the sliders, and like the effect you have, simply click OK and you
are done! A top notch black and white picture!
My example is shown
below:
Final steps . . .
If you are going to print your black and white picture, you will need
to flatten the layers. Go to Layer
and choose Flatten Image.
If you were planning to
print your black and white picture at home, then I would strongly
recommend you don't! Use a print service. Have a read of my printing
tips home page
to find out why.
And don't forget to have a look at my black and white photography tip#1
page to get an idea as to what
starting image makes a good black and white picture.
Next Steps . . .
Now that you know how to produce a top quality black and white picture - have a go, and then show if off to other visitors to the site!
Click here to contribute your black and white photo
Or, if it hurts your ears as much as it does mine, pass the link on to someone who'll really appreciate it.
 Get help using your camera with the complete Digital SLR Guide |