Make a quality black and white picture using Photoshop -
Black and white photography tip #1
 Read my black and white photography tip #1 before pressing that button!
When you first dive into black and white photography it's tempting to photograph anything and everything.
The household pets? Your garden? Maybe even the kitchen sink! (that chrome tap just has to look good in black and white, right?). After all, the world suddenly looks different to what we're used to.
Hold on though! Black and white photography tip #1 - before you press the button, think about the scene you are about to photograph.
The most important tip on this page is to think about the contrast in the scene before you take the photograph. Black and white photography suits some photographs better than others.
A little thought before you press that button can produce really good black and white photographs.
The duck test
Black and white photography tip #1: look for contrast!
Black and white photography needs a high contrast scene to start with. There should be a lot of difference between the light and dark parts of the photograph.
 The example photographs here illustrate this a lot better that I can explain it.
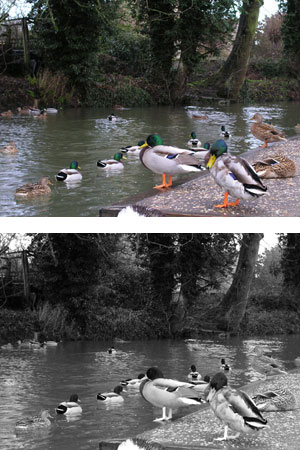
First, the photos of the ducks (why I was photographing ducks in the first place I've long since forgotten!). The photograph itself is pretty lifeless in its contrast.
No really bright areas and no really dark areas. Just a lot of “in between” areas.
When we convert it into a black and white photograph we end up with a very average photo.
It's ok. But it doesn't really make a punchy image at all. It looks like what it is – a colour photograph that's had the colour removed.
The duck photograph definitely does not follow black and white photography tip #1! This is one photograph that should have been left in colour.
Or maybe it's one photograph that should have been deleted shortly after it was taken!
It's ruined!
A good example of this black and white photography tip is shown below.
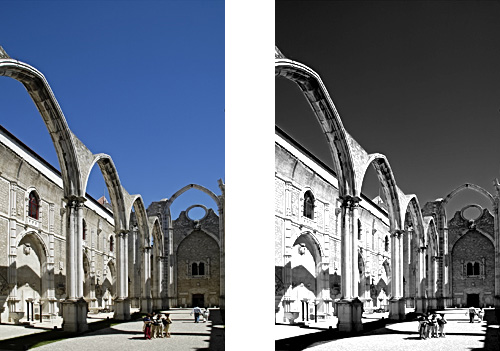
The photograph is of a ruined cathedral in Lisbon. It was ruined in the 1755 earthquake that devastated much of Lisbon (the things you learn when you travel!). And if you go to Lisbon, try some Ginga – it's delicious!
The reason I've put it here is because it's a photograph that has good contrast. It nicely demonstrates black and white photography tip #1. The image has light and dark areas right next to each other, all over the photograph.
When we follow the tip explained above (looking for contrast) to the scene we can see strong areas of contrast here. Especially where the white columns and arches meet the sky, and between the white columns and the shadows.
When we convert it to a black and white photograph it looks great!
The black and white photograph stands on its own, as if it was always meant to be black and white. It follows my black and white photography tip #1.
The same cannot be said of the ducks!
To help you to remember this tip – apply the “duck test”. Can you visualize the scene as a strong black and white photograph? Or will it always look like a colour photograph, but with the colour missing?
By the way (and this black and white photography tip is essential!), never, ever take your digital black and white photographs by using the camera's built in black and white function.
Have a look at my black and white photography tips home page to find out why.
Next Steps . . .
Now that you know how to produce a top quality black and white picture - have a go, and then show if off to other visitors to the site!
Click here to contribute your black and white photo
My son (that's him below) loves F1. He's started his own YouTube channel and would love it if you could take a look at one or two of his videos.
Or, if it hurts your ears as much as it does mine, pass the link on to someone who'll really appreciate it.
Or, if it hurts your ears as much as it does mine, pass the link on to someone who'll really appreciate it.
(probably someone a lot younger than I am!)
 Get help using your camera with the complete Digital SLR Guide |